DIY Ruger 10/22 Trigger Upgrade Kit Safety Instructions
Introduction
Thank you for choosing the DIY Ruger 10/22 Trigger Upgrade Kit from Brownells. This guide provides essential safety instructions to ensure the safe installation and usage of your trigger upgrade kit. Please read this document carefully before proceeding with the installation.
General Safety Guidelines
- Ensure that the firearm is unloaded and the safety is engaged before starting any work.
- Always wear appropriate eye protection when handling tools and firearm components.
- Keep all tools and parts out of reach of children and pets.
- Work in a clean, welllit area to prevent accidents.
- Familiarize yourself with the firearm's manual and the trigger upgrade kit instructions before installation.
- If you are unsure about any step of the process, seek assistance from a qualified gunsmith.
Specific Safety Precautions for Use
- Handle all firearm parts with care to avoid damage and ensure proper functionality.
- Be cautious of sharp edges on tools and components.
- Do not attempt to modify any parts of the kit beyond the provided instructions.
- Ensure that the workspace is free from distractions while working on your firearm.
- After installation, thoroughly test the trigger functionality in a safe environment before using the firearm for shooting.
Instructions for Installation and Usage
Preparation
- Gather all necessary tools and components included in the kit.
- Ensure the firearm is unloaded and the safety is engaged.
Removing the Old Trigger
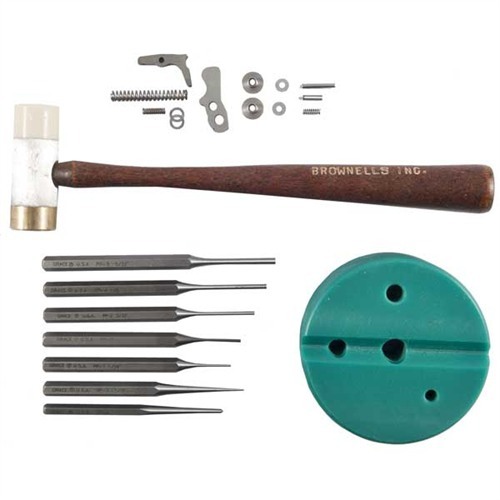
- Use the provided Grace Pin Punch Set to carefully drive out the pins holding the old factory trigger.
- Keep track of the pins and components removed during the process.
Installing the New Trigger
- Follow the kit instructions to install the Power Custom PreTravel 10/22 Hammer & Sear Set.
- Use the sear, disconnector/sear spring, trigger pivot pin, and other components as specified in the instructions.
- Ensure all parts are seated correctly and securely.
Reinstalling the Pins
- Use the punches to tap the pins back into place, securing the new trigger assembly.
- Doublecheck that all components are properly installed and that there are no loose parts.
Testing the Trigger
- After installation, perform a function check to ensure the trigger operates correctly.
- Test the trigger in a safe environment, ensuring the firearm is pointed in a safe direction.
Final Checks
- Ensure that the trigger pull meets your desired specifications.
- Make any necessary adjustments as outlined in the kit instructions.
Disposal Instructions
- Dispose of any old parts, packaging, and materials in accordance with local regulations.
- Ensure that all components are disposed of safely to prevent accidental use.
Contact Information for Further Support
For any questions or concerns regarding the DIY Ruger 10/22 Trigger Upgrade Kit, please refer to the Brownells website or contact their customer support for assistance.
By following these safety instructions, you can ensure a safe and successful installation of your DIY Ruger 10/22 Trigger Upgrade Kit. Always prioritize safety and seek help if needed. Enjoy your enhanced shooting experience!
 Help and contact






 Classical view
 Mobile view
